How to Paint Your Ski Helmet
Ski season is upon us and for me,
that means it’s time to start thinking about ski gear, and outfits in particular:) I’m the type of person that does not like to look like every other skier on the mountain, so you can find me constantly looking for unique jackets, cool goggles, or my new personal fave way to look different on the mountain: personally customizing my helmet.
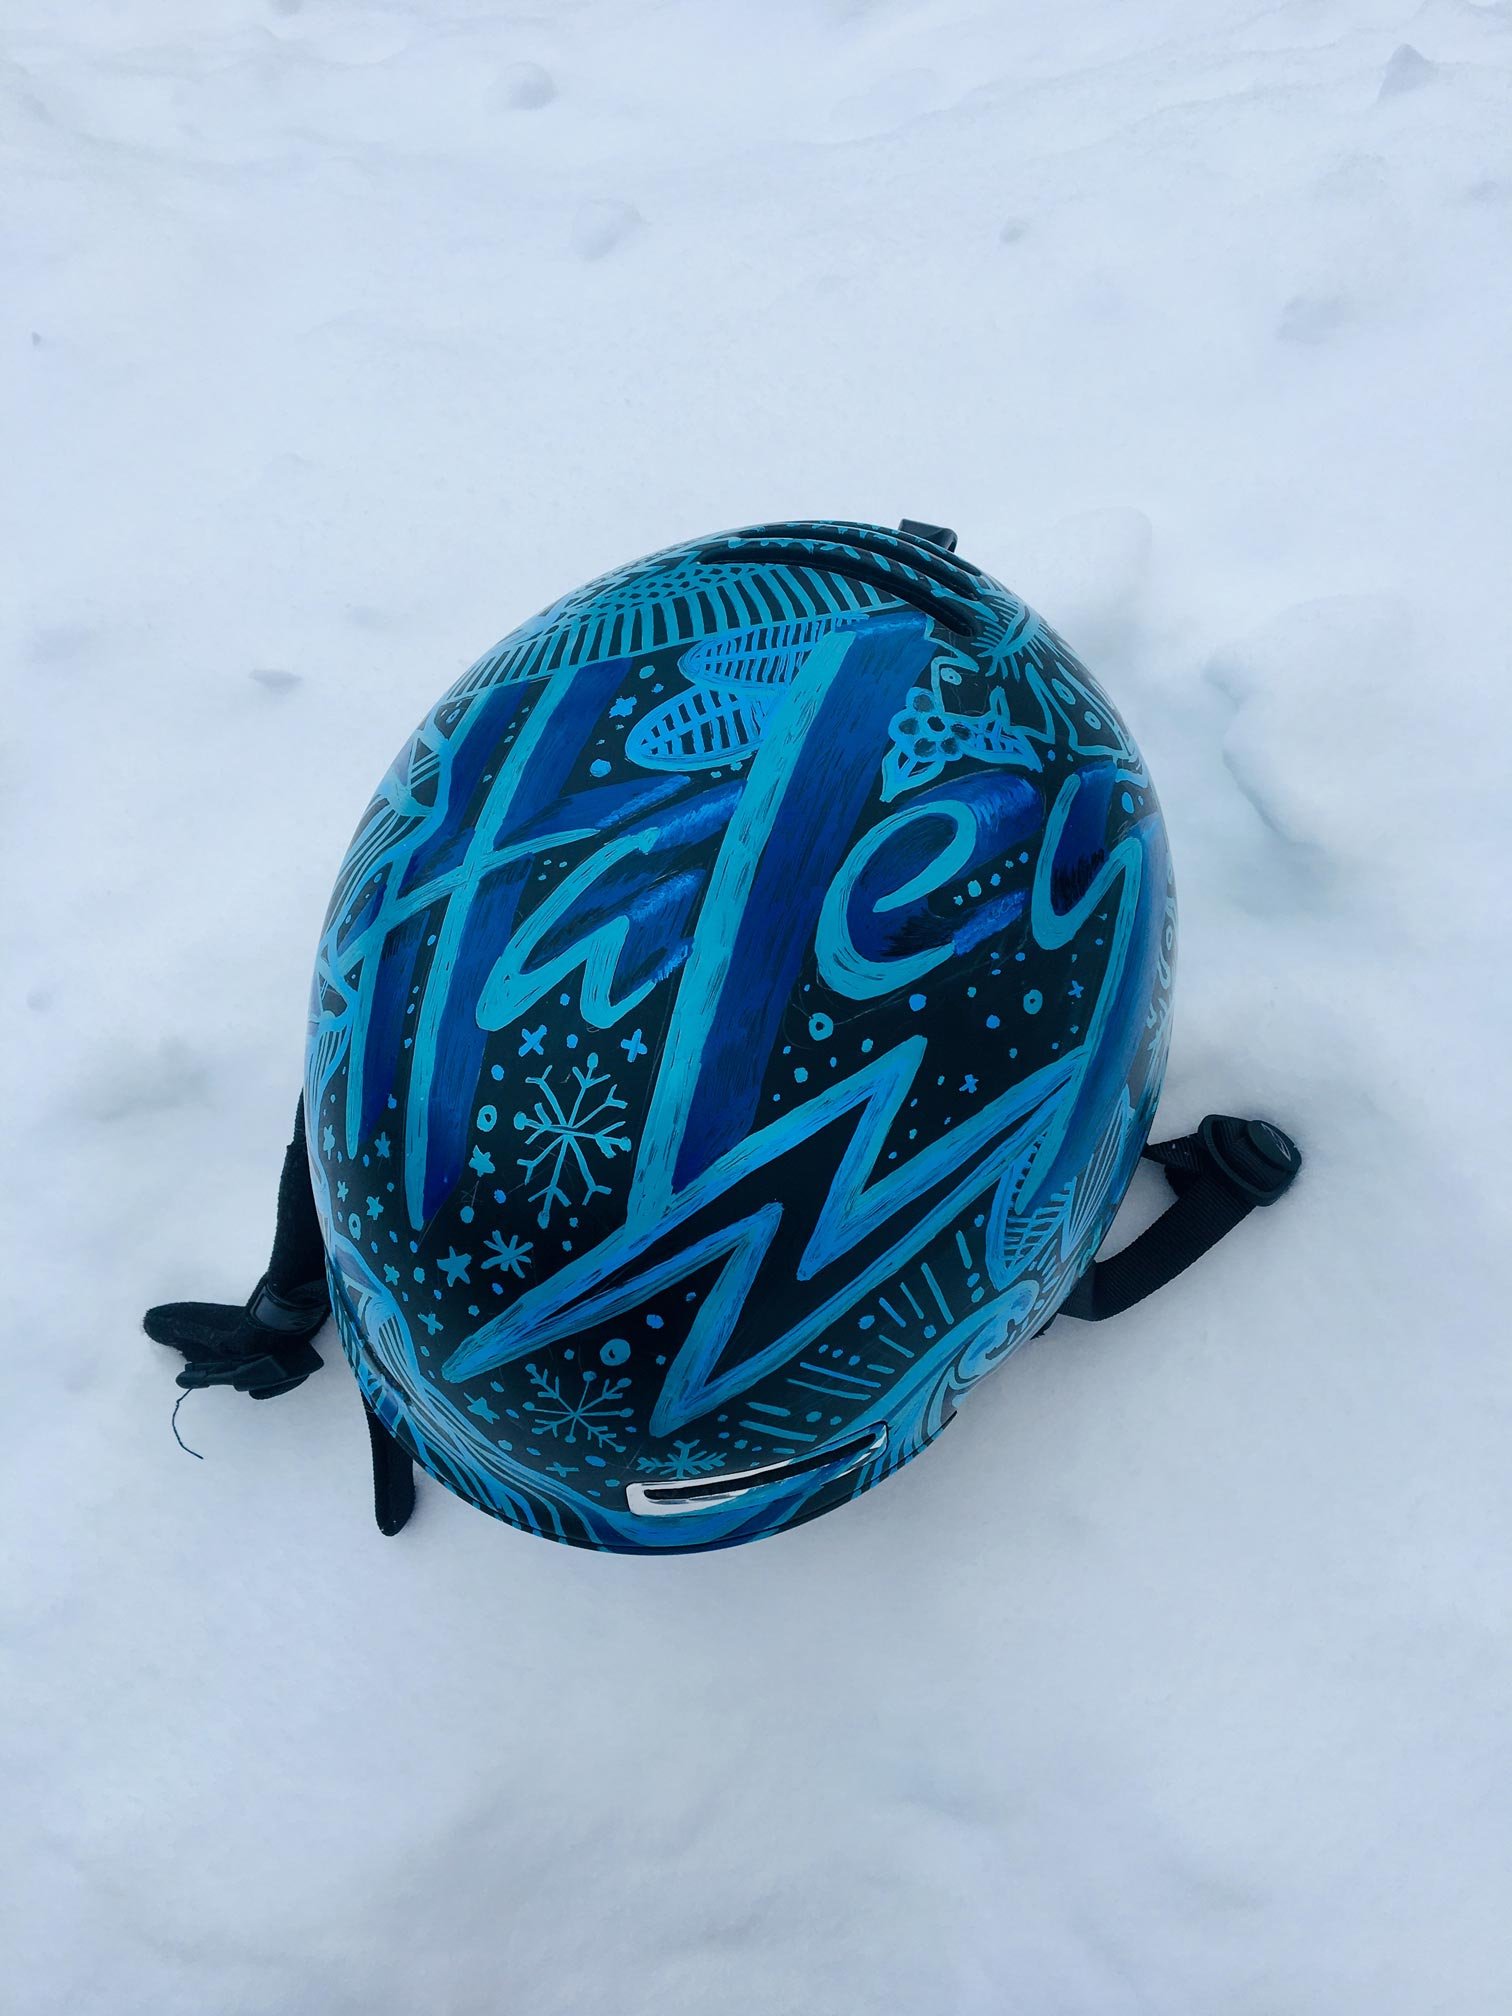
Let’s be honest, black helmets are boring, and like, everyone has them. Since they seem to be the standard, I’ve been searching for ways to make them more unique other than just adding stickers.
The past two years I’ve tested painting black (and white) helmets and it’s official: it’s definitely the coolest way to add a fun touch to your fit. Best part is that it’s simple and quick and can be done in a day. So get your helmet out, and let’s add some color!
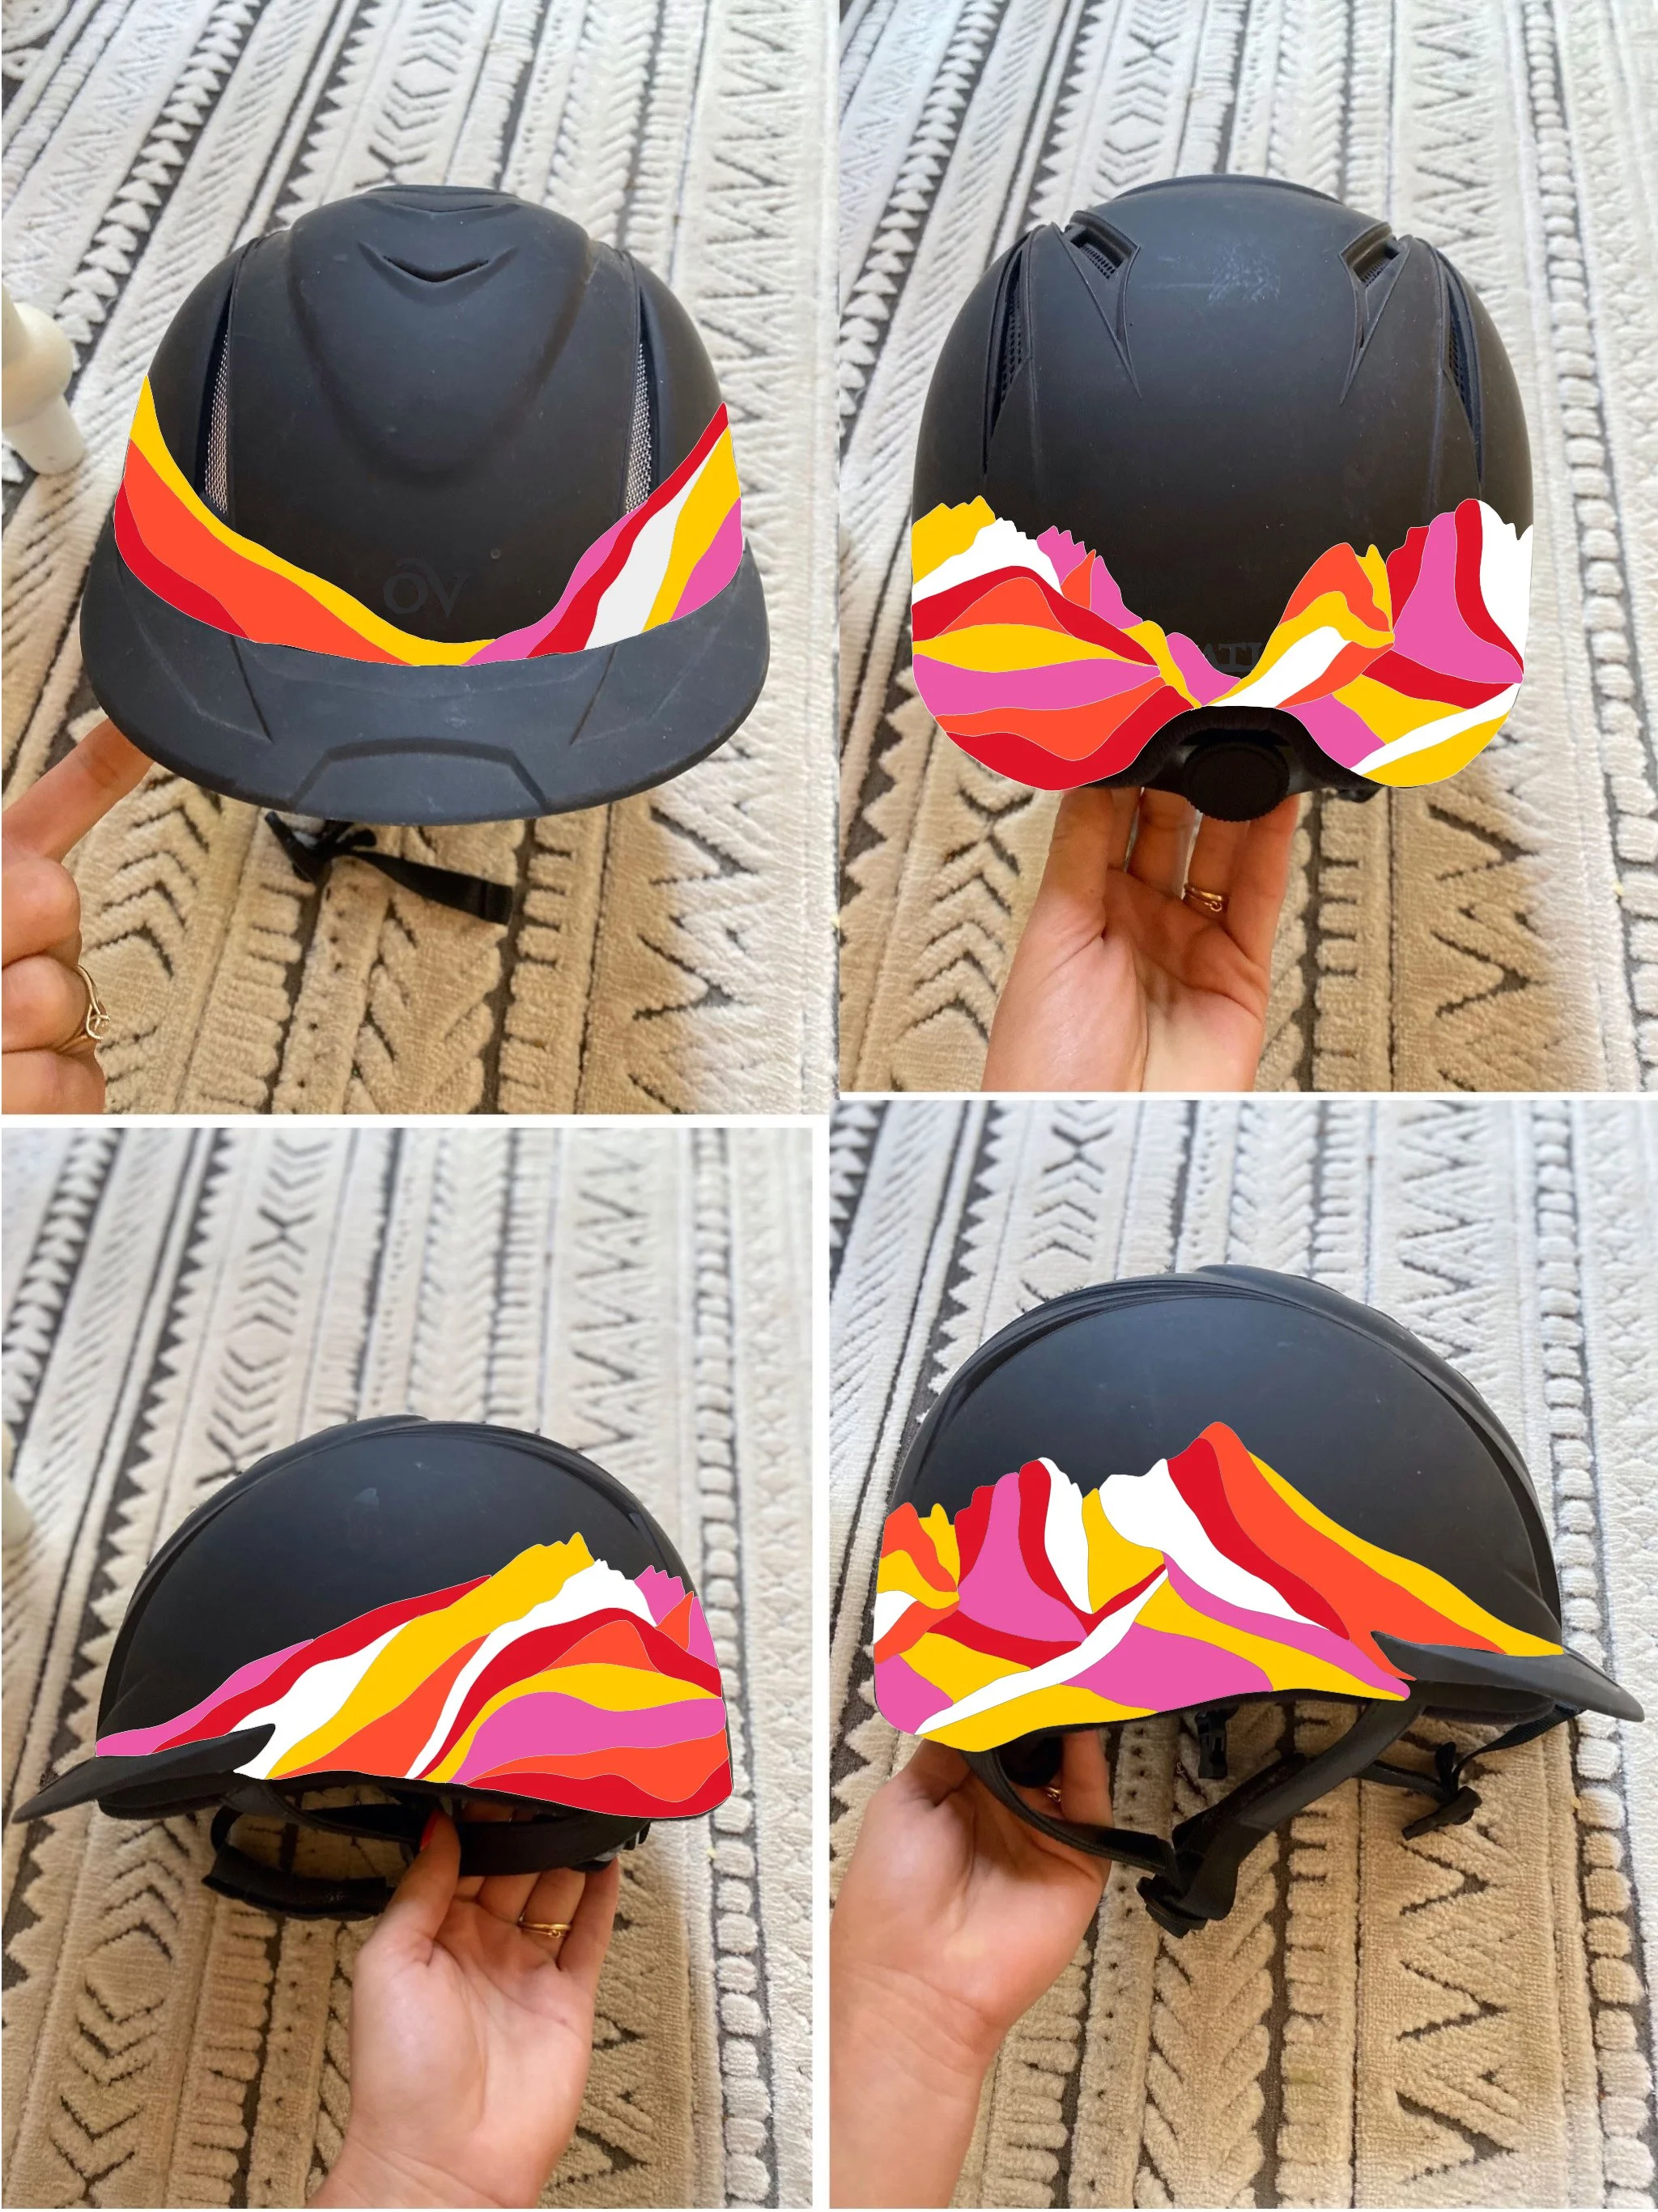
Here’s the mockup of a helmet I painted recently (it’s for horeseback riding, but the same technique is for ski helmets.)
To paint your helmet, you only need 2 things: a helmet and paint. It’s important to get the right paint though, one that won’t wash off if the snow sits on it. My personal fave is Krink K-42 Paint Markers.
These markers act closest to enamel paint and have a smooth, hard finish. But, if you don’t have those on hand, you could use Posca paint markers, enamel paint, or if you’re really in a pinch, even nail polish!

First things first, wipe the helmet down with water to get off any grime. It’s really smart to do a small test area in an inconspicuous area JUST to make sure the paint works well with the helmet. Last year, I was testing a new paint marker and didn’t realize until half done that the markers rubbed off with water!
If the marker is working well with your type of helmet (helmets are all created with different top coats), then it’s time to start your design. I typically mock-up my idea on my ipad, then sketch it on with a light pencil, and then go into the painting.

Plan on at least 2 coats, especially if you’re using light colors on a dark helmet. And if you find that the markers are producing too paint lines, you can always drip the paint and use a small paintbrush.
Once you’re finished painting, let it dry for a day. It might be tempting to want to topcoat it with a clear coat, but I would stay away from that. Last year I sprayed one of my with polyurethane and it crinkled and ruined the entire design. Sad! So, just trust using the paints I suggested and you’ll be good for at least the ski season (but probably a lot longer.)
Here’s a quick video to show you how quick and easy transforming your helmet can be. Good luck and have fun!
